Vibrato Article
An Approach to Teaching Hand Vibrato
by Fritz Gearhart
(appeared in American String Teacher,
Nov. 2016)
In his well-known book Principles of Violin Playing and Teaching, the pedagogue Ivan Galamian divides the vibrato motion into three separate categories: Arm, Hand and Finger. The expressive artist needs both an arm and a hand vibrato, so developing each is important for students. For my purposes here I will focus on “Hand” vibrato and a method for developing and organizing this specific motion. For this article I will ignore Galamian’s “Finger” vibrato; in my opinion this motion is a result of the other two, and not an independent motion.
As a university teacher, the most common situations I encounter are students who already posses an arm vibrato (with little or no hand vibrato), or students who have an ineffective hand vibrato (usually a motion that’s either very slow, or a motion that’s too tight and fast). I believe that through a gradual and consistent application of the following studio practice, I have evolved a method which is highly successful in helping these students.
The first question that arises in any discussion of vibrato, is whether one hears the top-most oscillation as the “pitch” of the vibrato, or whether one hears something in the middle. There has been some wonderful research on this topic (see Allen, M. L., Geringer, J. M., & MacLeod, R. B. 2009. Performance practice of violin vibrato: An artist-level case study. Journal of String Research, 4, 27–38). I believe this completely answers the posed question. For my purposes here, however, this discussion is not important. It doesn’t matter if the first motion moves the pitch flat or sharp, since the vibrato motion in question is a continuous motion. My focus is on developing an effortless motion, and helping the student to become aware of a new set of muscles moving together effortlessly in a kind of dance. One of the difficulties in teaching vibrato is that it involves a significant amount of motion that cannot be directed consciously -- that is, one cannot “think” one’s way into good vibrato. Often, very accomplished students can become frustrated because they have become accustomed to using the conscious mind to approach (and “conquer”) every problem. Of course this is true for many aspects of violin playing, and it’s part of our job as teachers to help the student overcome to this tendency.
Step One
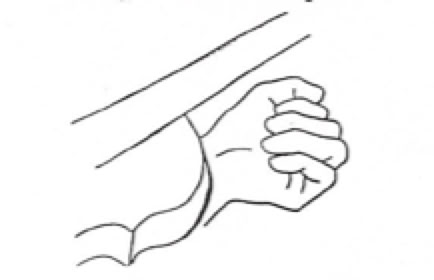
Perhaps the most essential concept of this entire approach is what I shall call a vibrato pulse. If we take the left hand and flop the wrist back until the hand is completely relaxed at the end of the arm, this is the starting point.
A “pulse” is a quick and light forward and rebound motion. One analogy would be: hitting a ping pong ball against a wall -- the only muscle involvement is a slight forward motion of the paddle, and then the ball travels forward, strikes the wall and returns. The same should be true with the hand.
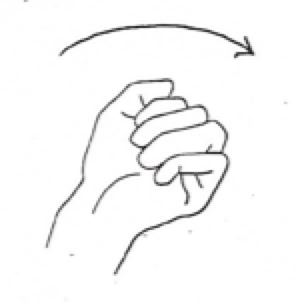
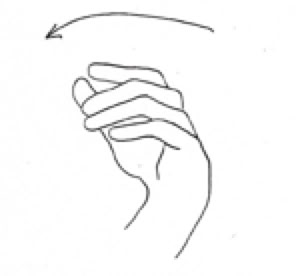
With a quick and light (almost electric) muscle involvement, starting from the front of the forearm, kick the hand forward (toward the body) and then allow it to fall back to the original position without any muscle involvement. This is crucial. The pulse involves only a tiny bit of muscle movement to start the hand moving forward, but is completely relaxed by the time the hand reaches the apex of the motion. This should first be practiced separately, away from the instrument.
Step Two
Placing the wrist on the bout of the instrument to the right of the neck, try the same movement.
Step Three
This is a very important step. Take your thumb and place it on the other side of the neck. The minute we place the thumb on the other side of the neck, students will tend to revert to previously learned muscle combinations. We explain that at this point the hand position may look “like the worst hand position you have ever seen”, with a collapsed wrist. No matter. We stress to the student that everything we are doing is “theoretical” and will have no bearing on the end result. Try to get an effective and relaxed pulse with the thumb on the other side of the neck. It should approach the same motion we produced in Step One, away from the instrument.
Step Four
With the hand essentially in third position and the wrist against the bout, we now drape (we use this word consciously) the second finger on the second string (A string for violinists, D for violists). The finger is extended so as to be almost flat (this is important). Trying the pulse idea now, the finger travels up and down the string on the surface of the string, “polishing” the string but not pushing the string down to the fingerboard. Try one pulse. Watch for forward and back traveling of the hand and finger. Does it get stuck at the top? Is the student pulling the hand back, or is it rebounding on its own? These are critical points. I often tell students at this point to breathe — exhale. Try a pulse, then pause, repeat. Pausing is essential. Impatient students will “try” to “make it happen” and repeat too quickly without pausing. We have to keep reminding them of the objective (remember the ping pong ball): only a forward kick of the hand — effortless, quick — the rebound occurs without effort.
This is often a good place to stop after the first introduction of these ideas. At this point, we remind students: “this has nothing to do with your playing at the moment.” We don’t try to incorporate any of these ideas into their regular playing of repertoire. This should be a separate exercise to be practiced twice every day for up to two minutes. A week later, we return to this work. I have them show me their pulse work. We can then add the same idea to the third finger and then the first finger. (We completely skip the fourth finger, see Digression One). Making comments as we proceed, we help to adjust the motion, if it does not seem effortless enough. If it does seem effortless, we can move on to Step Five.
Patience is essential. I think students often hope I’ll forget about this exercise at the next lesson! Some of them will be bewildered in terms of its relevance, and others may be openly hostile! (Refer to the movie Karate Kid.) As an entire process, it can take up to a year to complete. What is essential is to achieve an effortless pulse, so it behooves us to be patient at this early stage.
Digression One
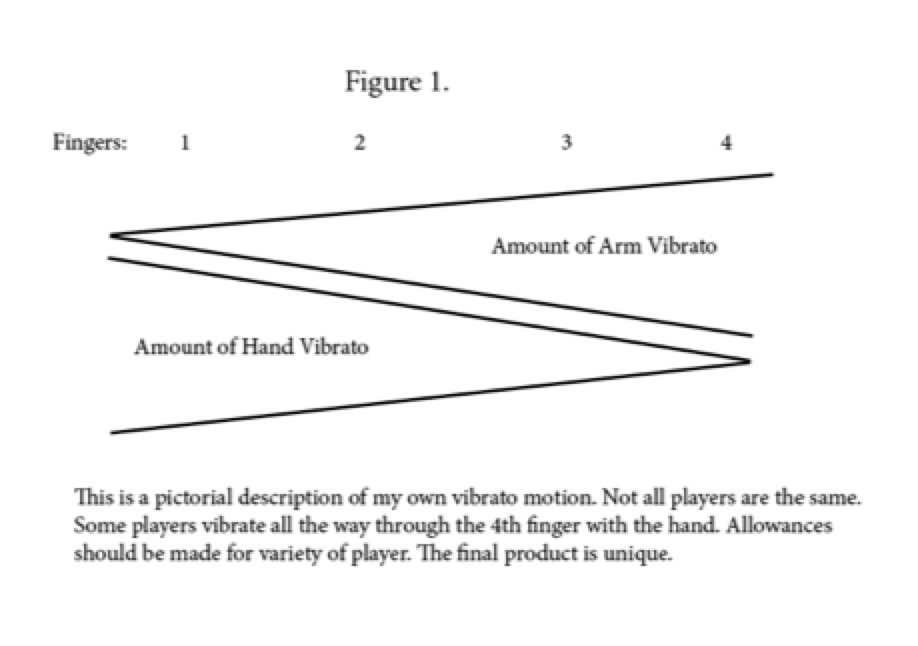
For my own vibrato technique, I use exclusively arm vibrato on the fourth finger. Here you will find variety. For my own personal technique, I use a hand vibrato mostly on the first finger, and then, gradually, the arm vibrato comes more and more into play, until I have exclusively arm vibrato on the fourth finger (see figure 1). By contrast, I know colleagues who use hand vibrato on all fingers including the fourth finger. The final product of this vibrato work will be a combination of vibrato motions using both the hand and arm, a technique which becomes entirely individual and personal.
The purpose of the pulse work, specifically, is to help develop and organize the hand motion. Eventually, as a final product, it is my belief that a fully functioning vibrato is a very complex dance between muscles on the front and the back of the forearm. So, eventually this dance of muscles might include pulses on the front and back of the forearm and pulses from the bicep (arm vibrato), depending on the register and position of the arm at any given moment. The goal of all of these exercises is to help students feel motion in pulses, which can eventually translate to other muscles.
Step Five
Now we connect the pulses as we would small train cars. Try two pulses, like a heartbeat. The ping pong ball analogy is important at this stage too. Imagine you are tapping the ping pong ball just at the precise moment to send it again to the wall after it returns to your paddle. Watch that two pulses are relaxed and effortless. Do they get stuck in the middle? They should look uniform in the distance the hand travels — two even pulses.
Digression Two
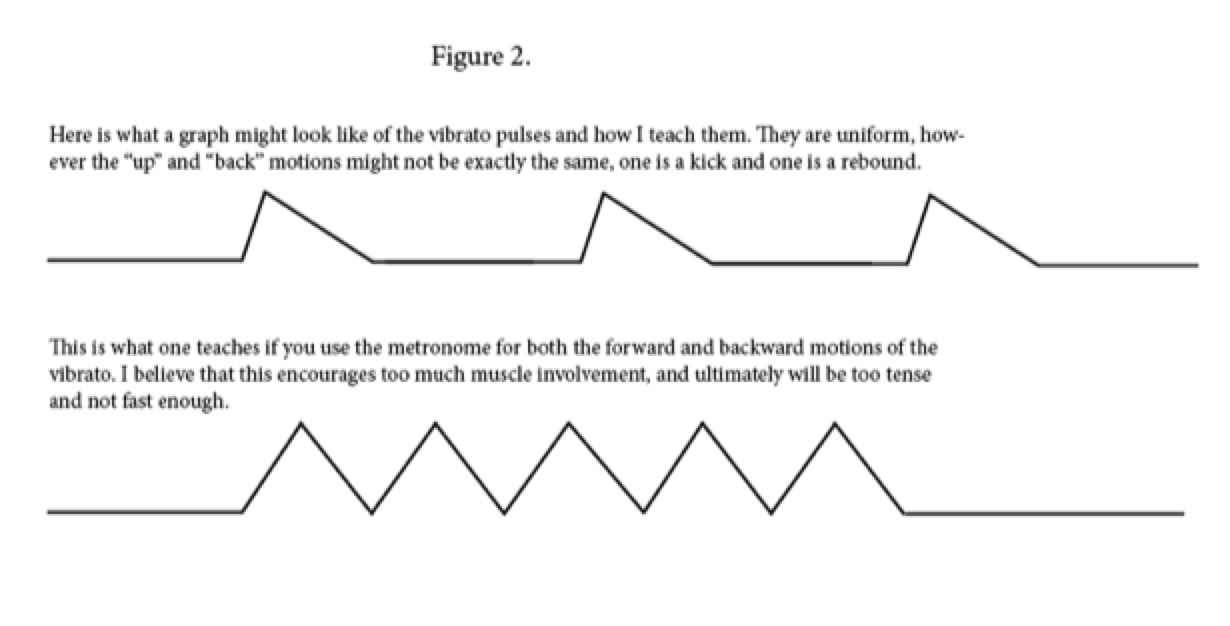
One important aspect of this approach is that one pulse equals both a forward and backward motion of the hand. I do not necessarily advocate metronome work with vibrato (especially a metronome tick for each forward and backward motion of the hand — I suppose one metronome tick for forward and back as one motion is OK.). In observing the vibrato, it is possible that the forward and back motions are not equal (the motion might move slightly faster forward than back). It should still be a balanced and “even sounding” motion (see figure 2). Most importantly, there is only one bit of muscle-effort kicking the hand forward. Practicing forward and back motions with the metronome encourages muscle involvement on both the forward and backward motions of the hand. This would make the motion too slow and also make it difficult to speed up.
Step Five Continued
We can now increase the number of pulses. I often say: “This week practice one to three pulses. Make sure you pause in between repetitions. Build it gradually.” As I said earlier, pauses are essential. Through pausing we are teaching the hand what complete relaxation feels like. At each subsequent lesson we watch to see that the hand doesn’t get stuck in the middle, that the “kick” is happening at the correct time (remembering ping pong ball against the wall), that the pulses are uniform and traveling the same distance. For example, some students will kick the hand too early as the hand rebounds, so that the second pulse is shorter and doesn’t travel the same distance as the first pulse. (Note: in a typical lesson I only spend five minutes on vibrato work after the initial explanation.)
Through the weeks we increase the pulses. I usually assign work like this: “try one to three pulses”, “three to five pulses”, “five to seven pulses” etc. Eventually we achieve what we call “continuous” motion. Here we say to the student: “start” (the motion begins) and “stop” (the motion stops). We repeat this several times. This entire process develops over a period of up to three months. If we reach five pulses (for example) and the hand gets tight, or if it stops working easily, we drop back to a previous level for a while. We keep repeating to the student: “This is just a concept, it still has nothing to do with your playing or your regular vibrato.” Remember we are still on the surface of the string, and not pressing the finger down. Once we are confident that this motion is working well, we will introduce the “finger down” (next step). I often assign three to five polishing pulses and then begin the finger down pulses from the beginning, overlapping steps five and six.
Step Six
Now we try putting the finger down to the fingerboard. If this step seems difficult for the student, an intermediate step can be offered: try one pulse polishing, and for each repetition add a tiny bit of finger pressure until the finger stops sliding and we see a forward and back motion of the knuckle. I like to say, “Imagine your finger has a tiny bit of glue that keeps it on the same spot.”
For this step, place the finger far away from the hand, almost flat. This is most important. The pulse of the hand we have been practicing now causes the knuckle of the finger to move and the fingertip to roll forward (toward you). It is this rolling motion that causes the pitch change of the vibrato. The more pitch change, the better. A nice wide pitch change will result in an effortless vibrato motion.
We work up these pulses on second finger, and then first and third as we did with the polishing pulses. A typical assignment at this stage would be: three to five polishing pulses and one to three pulses with the finger down. Increase this gradually over the weeks to come.
Digression 3
This entire approach is based on the forward motion of the hand. I have found this the most effective way of developing a hand vibrato. With one student, I was not having any success during the first few stages, and I tried working the entire system backwards -- that is to say, starting the motion from the top and moving backward, returning to the top. This seemed to work with this student, although, theoretically, gravity would not be helping return the hand to the starting position, so there must have been muscle involvement to hold the hand forward to begin with. It worked in this unusual case, but the vast majority of students have responded to my initial approach. It seems it is easier to teach “zero” muscle involvement from the hand, as it is relaxed back and away from you.